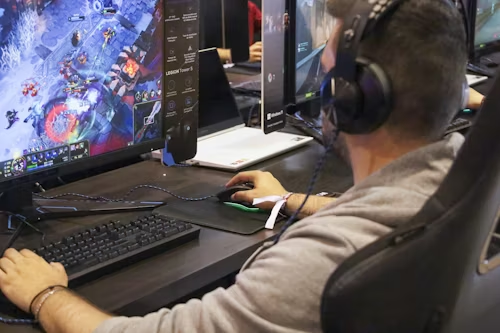
Gaming on PC can be an amazing experience, but if your computer is slow, lags, or struggles to keep up, it can quickly become frustrating.
The good news? You don’t always need a brand-new machine to enjoy smoother, faster gameplay. With the right optimizations, you can unlock better performance, improve your frames per second (FPS), and reduce stuttering, all without breaking the bank.
In this guide, we’ll walk you through how to optimize your PC for gaming step by step.
Why Optimize Your PC for Gaming?
Optimizing your PC is like tuning up a car; it makes sure all the parts are working at their best. When you optimize, you:
- Improve FPS (frames per second) so games feel smoother.
- Reduce lag and stuttering.
- Lower load times so you get into the game faster.
- Extend the life of your hardware.
Even if you don’t plan to upgrade your computer anytime soon, proper optimization ensures you get the best performance possible from what you already have.
Step 1: Keep Your PC Clean and Updated
1.1 Update Windows and Drivers
Your operating system and drivers are the backbone of performance. Outdated software can cause lag, crashes, or poor performance.
- Update Windows: Go to Settings → Update & Security → Windows Update.
- Update Graphics Drivers: If you have an NVIDIA card, use GeForce Experience. For AMD, use Adrenalin Software.
- Update Other Drivers: Chipset, audio, and network drivers also help with stability.
1.2 Clean Dust and Improve Airflow
A dusty PC overheats, which slows performance.
- Use compressed air to clean vents and fans.
- Make sure your PC has good airflow (don’t push it against the wall).
- Consider extra fans or a cooling pad (for laptops).
1.3 Remove Junk Software
Unnecessary programs use memory and CPU power.
- Uninstall unused apps from Control Panel → Programs and Features.
- Use Task Manager (Ctrl+Shift+Esc) to disable apps that start with Windows.
Step 2: Optimize Windows Settings for Gaming
2.1 Enable Game Mode
Windows has a built-in Game Mode.
- Go to Settings → Gaming → Game Mode and turn it on.
- This prioritizes gaming performance.
2.2 Adjust Power Settings
Your PC might be running in “balanced” mode to save power.
- Go to Control Panel → Power Options.
- Select High Performance or Ultimate Performance.
2.3 Disable Background Apps
Apps running in the background can steal resources.
- In Settings → Privacy → Background Apps, turn off apps you don’t need.
2.4 Disable Visual Effects
Fancy animations look nice but eat performance.
- Right-click This PC → Properties → Advanced system settings → Performance Settings.
- Choose Adjust for best performance.
Step 3: Optimize In-Game Settings
Every game has its own graphics options. Finding the right balance between visuals and performance is key.
3.1 Lower Resolution and Graphics Quality
- If your game stutters, drop the resolution from 1080p to 900p or 720p.
- Lower demanding settings like shadows, anti-aliasing, and textures.
3.2 Use V-Sync or G-Sync/Freesync
- V-Sync prevents screen tearing but may lower FPS.
- If your monitor supports G-Sync or Freesync, enable it.
3.3 Adjust FPS Limits
Some games allow you to cap FPS. Setting a stable frame rate (like 60 FPS) can prevent sudden drops.
Step 4: Upgrade Hardware (If Needed)
Sometimes, no amount of software tweaks will help if your hardware is outdated.
4.1 Add More RAM
- For modern gaming, 16GB of RAM is ideal.
- If you have 8GB or less, upgrading can make a huge difference.
4.2 Upgrade to an SSD
- SSDs load games much faster than traditional hard drives.
- Even moving your operating system to an SSD makes everything feel snappier.
4.3 Upgrade Your Graphics Card (GPU)
- This is the single most important upgrade for gaming.
- Research GPUs that fit your budget and power supply.
4.4 Consider CPU Upgrades
- Some games rely heavily on the CPU.
- A faster processor can help reduce stutter.
Step 5: Use Optimization Tools (Carefully)
5.1 Built-in Tools
- Windows Disk Cleanup helps free space.
- Defragment and Optimize Drives improves HDD performance (not needed for SSDs).
5.2 Third-Party Tools
- MSI Afterburner: For monitoring and overclocking.
- CCleaner: For cleaning junk files (but avoid overusing registry cleaners).
Tip: Always download tools from official websites to avoid malware.
Step 6: Improve Network for Online Gaming
Nothing ruins a multiplayer match like lag.
6.1 Use a Wired Connection
- Ethernet is faster and more stable than Wi-Fi.
6.2 Optimize Router Settings
- Restart your router regularly.
- Place it in a central location for better coverage.
6.3 Limit Background Downloads
- Pause software updates and streaming while gaming.
- Use “QoS” settings on your router to prioritize gaming traffic.
Step 7: Overclocking (Advanced)
Overclocking means pushing your CPU or GPU beyond factory speeds. It can give more performance but also generates heat.
- Overclock your GPU with MSI Afterburner.
- Overclock your CPU with BIOS settings (only if you have a cooling system).
- Always test stability with tools like Prime95 or 3DMark.
Warning: Overclocking can void warranties and damage hardware if done incorrectly. Only attempt if you’re confident.
Step 8: Maintain Your PC Regularly
Optimization isn’t a one-time thing. Keep up with:
- Monthly driver updates.
- Regularly cleaning dust.
- Checking storage space.
- Monitoring temperatures with tools like HWMonitor.
Extra Tips for Smoother Gaming
- Close unnecessary browser tabs while gaming.
- Update DirectX and Visual C++ Redistributables for compatibility.
- Lower monitor resolution or refresh rate if hardware struggles.
- Consider cloud gaming (like Xbox Cloud or GeForce Now) if your hardware is too weak.
Discover more from HUMBLETECK
Subscribe to get the latest posts sent to your email.
Leave a Reply